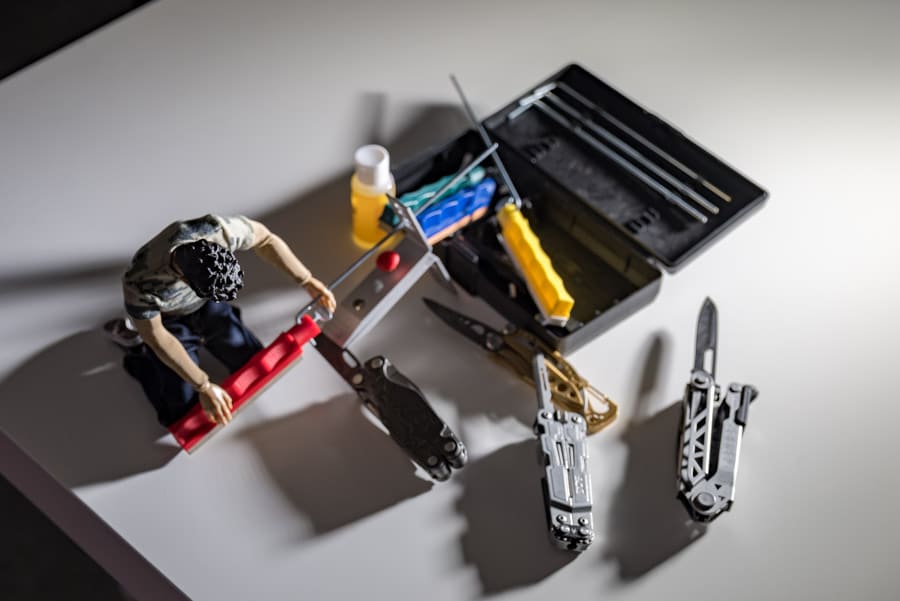
I would argue the knife is the most important tool on most multi-tools. The most important and the most commonly used so, at some point, it’s going to get blunt. And we know a sharp knife is a safe knife, right? So what do you with a blunt knife on your multi-tool? Nothing? Throw your multi-tool away? Carry a separate knife with your multi-tool?
How about just sharpening it? Sounds like a good idea but how easy is it to do that if you don’t have a lot of experience sharpening knives?
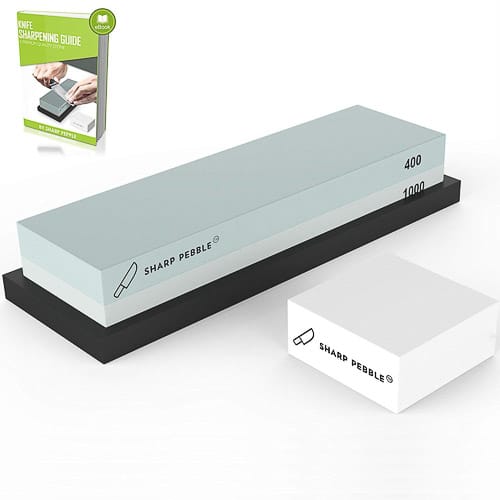
The easiest way to sharpen a multi-tool knife is to use a double-sided diamond coated sharpening stone. Something that has a coarse stone on one side (about 300 grit) and a fine stone on the other (about 1,000 grit) These types of stones are inexpensive and come in a compact size that you can use at home or take away with you if you need to.
The Basics of Sharpening a Multi-Tool Knife
There are a lot of different methods and tools available to do the job of sharpening a multi-tool knife. If we bring it back to the basics, sharpening a knife is simply about removing steel equally from each side of the blade edge to bring it back to a sharp point. So you need something to rub against the steel to wear it away and you need to rub it in a way that makes each side of the blade meet in a sharp point.
Think of it like sanding a rough piece of timber with a coarse grain of sandpaper to cut quickly through the bulk of the roughness which leaves it smoother but leaves the timber surface with visible scratches from the sandpaper. Then you switch to a finer grade of sandpaper that takes out the scratch marks and leaves a smooth even surface. This is the same principles used to sharpen a blade edge.
Pretty much every technique for getting a sharp edge is based on starting with running a coarse grain sharpening material (like 150 – 300 grit) across each side of the blade edge or the other way around – running the blade edge across a coarse sharpening material. Then doing the same with one or more finer grain materials (like 1000 grit) to smooth out and sharpen the edge finish.
The angle that the blade and the sharpening material meet determines the angle of the finished blade edge – called the edge angle. Most blade edges will have an angle between 15 and 30 degrees. Different angled edges perform differently but let’s not get too technical here. We’re Multi-Tool MacGyvers, not Knife Nerds! Generally speaking, the smaller the edge angle (for example 15 degrees), the sharper the blade and the less robust it is. Everything being equal, a knife sharpened at 30 degrees won’t be as sharp as one sharpened at 15 degrees but will take more of a beating. Don’t get me wrong, a well sharpened knife is still very sharp. It’s to do with the amount of steel at the blade edge – logically, the more steel, the better the edge will handle rough treatment but it’s a thicker edge so won’t slice through stuff as well.
To get a consistent angle on the blade and on both sides of the blade, you need to rub the sharpening material across the blade at a consistent angle each time. To do this by hand takes practice. That’s why a lot of ‘systems’ to sharpen knives have a guide that helps you to set and keep the angle consistent and requires less of a learning curve to get it right. But a ‘system’ means more pieces of equipment so for simplicity and carry-ability, that’s why I say the easiest way is just one sharpening stone.
What’s the Easiest Way to Tell if your Knife is Sharp?
Unless you’ve got a lot of experience with knives, it’s not that easy to tell if your multi-tool knife is sharp or not. You would think that if the knife is blunt, it won’t cut. Simple. But you don’t always know whether something isn’t cutting as you think it should because your knife is blunt or what you’re trying to cut is tougher than you thought.
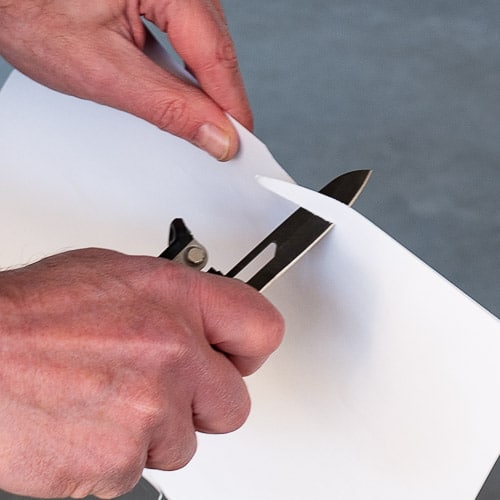
My favorite way to check is to grab a piece of printer paper or maybe my sky high electricity bill! I hold it edge up and run my knife along the edge on a downward shallow angle. If your knife is sharp it will start to slice the paper cleanly without grabbing or tearing. If it’s blunt, your knife could just slide across the top of the paper or it could grip and tear the paper.
If you don’t have a piece of paper handy, you can try the arm hair shaving method. Run the blade against your hair ‘grain’ like you would a razor blade and see if it can give you a shave. If it can, it’s sharp.
Let’s say you don’t have paper or arm hair available, you can use the method my father taught me. Hold your knife edge up with one hand and gently drag the thumb of your other hand across (perpendicular, not down!) the blade. If it feels like it is grabbing your skin, it has some sharpness. Another variation of this is to gently run the blade across a fingernail. If it’s sharp, you’ll feel it gripping or be trying to cut a channel in your nail. These are my less favorite methods as I don’t think they are best ways to tell if your knife is sharp and you need to be careful you don’t actually cut yourself.
The most accurate way to tell if your knife is sharp is to use the sewing thread and weights method. Make a loop out of about a foot of thin sewing thread and lay it horizontally across the upturned blade of your knife. Then start hooking the lead balls onto the bottom of the loop. The more balls you can add before the thread is cut, the blunter your knife is. Obviously, you need to have some balls with hooks on them handy but once you’ve achieved that, you have the most accurate way to tell sharpnesss.
OK, we’ve decided our knife could be sharper. Now let’s look at which sharpening methods are best for different situations and you can choose which one is right for you.
The best method in the field for the well prepared – Sharpener stones
Sharpener stones are easy enough to use but like every method of sharpening a knife, there are some techniques you need to master before you get it just right.
Start with a coarse grit to quickly get a sort of sharp edge (something like a 300 grit stone) and finish off with a fine grit stone (something like 1,000 grit) to sharpen further and leave a smooth edge surface. Because we’re in the field, we’re not going to carry a lot of different grits with us that we might use if we were sharpening at home. But you don’t have to use a lot of different grits to still get a very good sharp edge. Of course, if you have them with you, feel free to use a few different grits between coarse and fine.
You can tell how coarse or fine a sharpener stone is by the grit number. Like sandpaper grit numbers, the lower the number the more coarse the grit. That means more material will be removed more quickly and the surface finish will be rougher. You’ll be able to see the scratch marks on the edge left by the stone. And vice versa. The higher the grit number the less material will be removed but the smoother the finish.
The hardest part to get right is holding the angle of the knife at the right angle to the stone and maintaining that same angle as you draw every time across the stone. You want to choose an angle somewhere between 15 and 30 degrees and maintain it the whole time and for both sides of the blade. It takes practice to get it right and it takes time to get a sharp edge. Keep checking, keep the angle consistent and keep the number of strokes on each side of the blade the same.
The best sharpener stones use monocrystalline diamonds that have been electromagnetically plated to a single piece of steel. You can pay a lot of money for stones so make sure you’re going to use them and shop around. The Sharp Pebble 2 grit Sharpening Stone Check the current price on Amazon isn’t the smallest one out there so you might want to look for something more portable if you want to carry it around with you.
The best method in the field for the ill-prepared – mates multi-tool diamond file
You and your mate are in the great outdoors and you find your knife is blunt and you haven’t packed your sharpener stones. What to do? If your mate has a multi-tool with them, have a look for the diamond-coated file. A lot of multi-tools have one. Or you could be like me and carry 2 multi-tools. You can use the file to quickly give your multi-tool knife an edge.

Use it like a sharpener stone and hold it at a 15-30 degree angle and run it along the edge of your blade. Only use light pressure and use the same number of strokes on each side of the blade keeping the angle consistent. Check the edge frequently for progress. You’re not trying to get a perfect edge, this is an emergency procedure for use in the field to get you out of trouble. Be better prepared next time MacGyver!
The best method at home for the well prepared – sharpening system
The principle is the same, rub something abrasive along the blade edge to bring it to a point. Sharpening systems work on that principle.
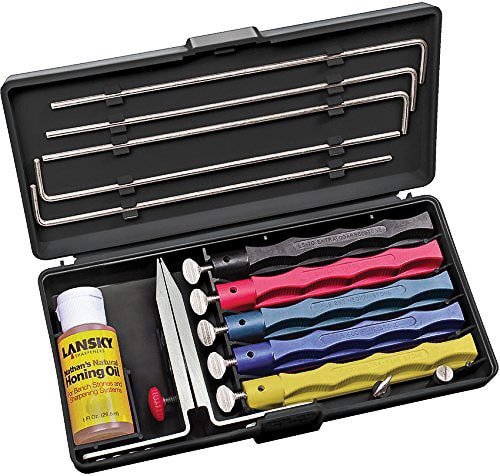
I own a Lansky 5 stone sharpening system. It comes in a plastic case and contains a handheld vice to grip my multi-tool knife and 5 sharpener stones of grits from coarse to fine. Attach the rod to the stone and slot it into vise at the blade angle you want. The rod and slot guide the stone to keep it at the same angle while you run it across your blade. Move through the 5 rods from coarse to ultra fine grit to sharpen. I found there is still a technique to get it right but I’ve mastered it now. It just took a bit of patience. The big benefit a system has over something like a double-sided diamond coated stone is the guide that keeps the angle of the stone to the blade edge consistent so you get a good even bevel.
The Lansky isn’t the only hand sharpening system around, there are plenty to choose from that work in variations of the Lansky system. They aren’t that expensive either and you can use them to sharpen any knives you have around, not just your multi-tool knives.
The best method at home for the time poor or knife collector – electric knife sharpener
If you have a lot of knives or you just want to get the job done quickly, the best method for you could be an electric knife sharpener. An electric sharpener works like a belt sander for knife blades. Set the blade angle you want, start the sharpener and grit belt spins so you can drag your knife blade between the belt and the guide to sharpen your knife. Job done in minutes. You can even use this type of sharpener to easily sharpen up your tools like your favorite ax or wood splitter. There’s a small learning curve for this type of machine before you get excellent results.
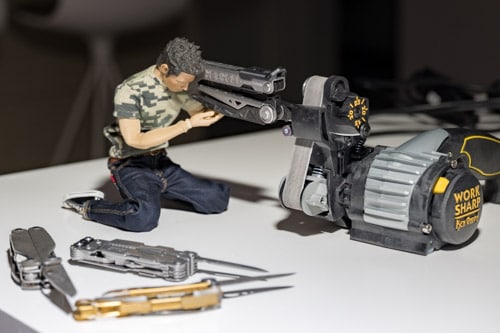
Although I’ve got the Lansky hand sharpening system, I’ve been thinking seriously about getting an electric sharpener. I have a lot of multi-tools because I live the multi-tool life and I have a few knives as well. An electric sharpener would encourage me to keep on top of my sharpening duties. So I did some research and the sharpener that gets really good reviews is the Work Sharp Knife and Tool Sharpener. It even comes in an uprated version developed with the well-known knifemaker Ken Onion. Prices run around $70 and about $130 for the Ken Onion edition. Check the current price on Amazon. UPDATE: I bought one! I’ll post a review of it once I get some experience with it.
The best method for the well-heeled – outsourcing
I don’t think this method is going to appeal to many of my fellow Multi-Tool MacGyvers because we tend to be hands-on can-do sort of people. But if you don’t want to bother with mastering the techniques of knife sharpening by hand or with a machine, there are people who will do this for you. You can take your multi-tool knives down to a knife sharpening service or some will even come to you. Of course, you do lose some control over the process and you do have to pay for it.
How often do you need to sharpen your knife?
Well, it depends on a few things…..
- The Blade Steel – some blade steels are better at keeping a sharp edge than others. There’s a thing called ‘edge retention’ that knife guys talk about and it refers to how good a knife steel is at retaining its sharpness. The trouble is, there is no real scientific standard measurement that you can rely on. The truth is that edge retention is a combination of a couple of characteristics of the blade steel – the steel’s hardness – its Rockwell C Hardness (RC number (HRC)) which is about how it resists forces that try to deform it and the composition of the steel itself and how well it resists abrasion. All that means is that if the blade doesn’t get out of shape and doesn’t get rubbed smooth when you’re using it, then it will stay sharp.
- How frequently you use it – this is an obvious one. If you use it a lot, it’s going to get blunter, sooner.
- What you use it for – another obvious one. If you use your knife to cut hard abrasive things it’s going to blunt more quickly than if you use it as your favorite butter knife.
- Maintenance – if you don’t keep your knife clean and dry, it will dull the edge more quickly than if you do a little maintenance on it before you fold it away. Even though your multi-tool knife is most likely stainless, that doesn’t mean it’s stain proof, it just means it will “stain less”. Anything that’s stuck to the blade edge will make it wear faster.
Hopefully, that’s given you a few choices on how to keep your multi-tool knife sharp. It’s really not that hard and MacGyver once said “a sharp knife is a safe knife”. I may have made that up but it’s certainly a true statement. The sharper the blade, the less pressure you have to use to cut something and therefore less chance of the knife slipping and cutting you.
Multi-Tools – Never leave home without one!
For the latest multi-tool images and other cool EDC stuff, follow me on Instagram
Do you keep your multi-tool knife or knives sharp? What’s your favorite way of sharpening them? Let me know in the comments below.
1 thought on “The Easiest Way to Sharpen your Multi-Tool Knife”
Comments are closed.